Managing Resources
In EDP, users can browse over lists of current resources in their environment, filtering and combining them in groups.
Runtimes
In Runtimes, the entry view on the left lists the available runtime groups. Once a group is selected, all its components (single runtimes or other runtime groups) are listed. At this point, users can edit the groups’s description, and define properties.
The definition of properties is important to accentuate aspects and values that are central to identify and manage groups (as well as single runtimes). Through properties, runtimes and groups can be filtered, selected and combined. The value of those properties is also the way to dynamically associate - or disassociate - runtimes from fleets. For more information, see this section.
Groups can help users with filtering and managing multiple runtimes, for example by simplifying the process of running a feature on a number of runtimes.
Filters and properties are the best way to add new components to a group - being those components single runtimes or other runtime groups.
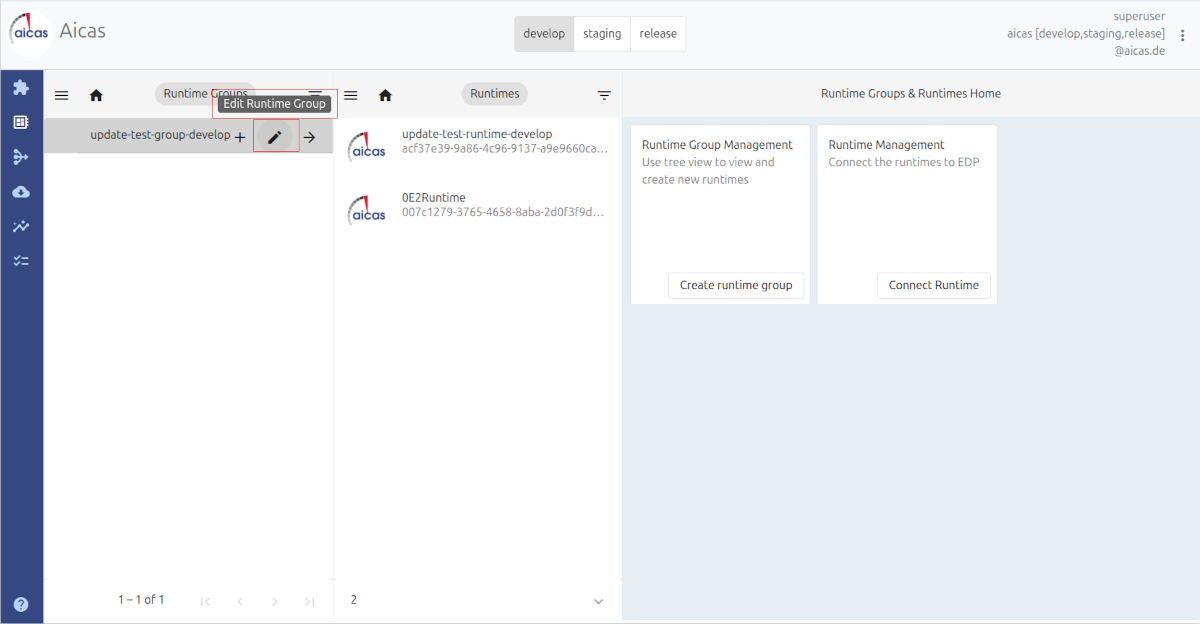
To add, first choose to “edit” the runtime group.
When adding new components to a runtime group, two new columns appear at the right side of the display, that act as containers to the added groups and / or single runtimes. A good way to “match” components to a group is filtering properties that share the same values.
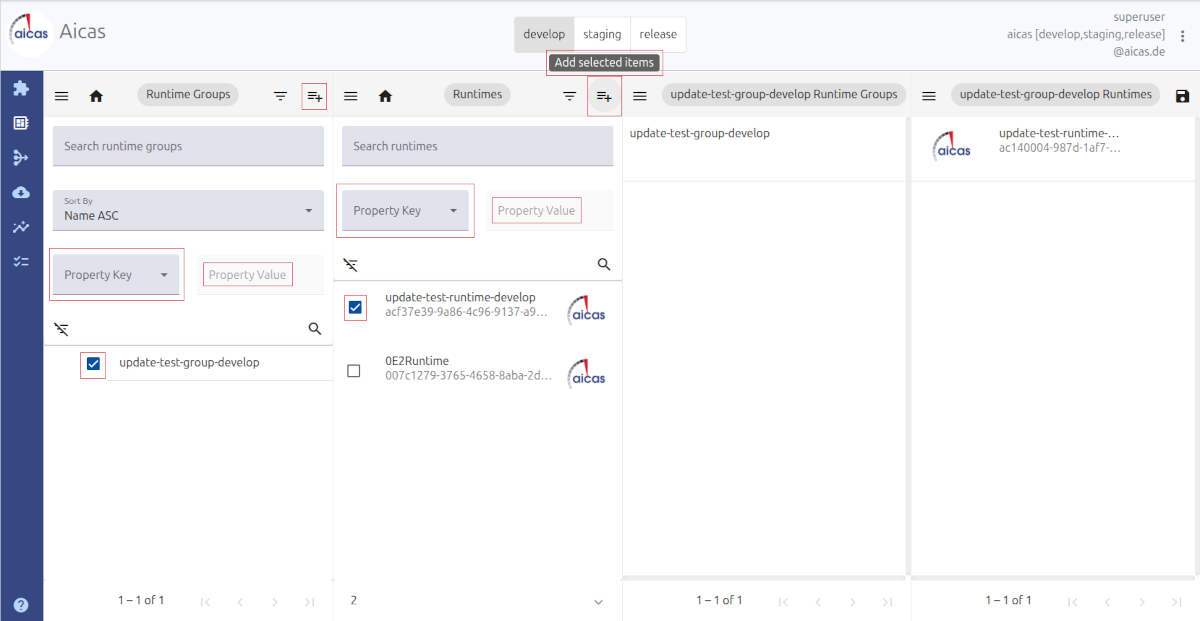
Filter and select the components that match to the group.
After finding the desired match, click on the component and press “Add selected items”. Or simply drag and drop the selected component to the columns on the right hand side.
Install, Uninstall, Start, Stop
By selecting a single runtime out of the list of available runtimes (Home menu), its status is displayed: type, architecture, operating system and environment. All bundles installed on the chosen runtime are listed, showing basic information such as id, symbolic name and version. In the context of the OSGi specification, a bundle’s symbolic name, together with its version, serves as its unique identifier.
The state of the bundles, which reflects their life cycle (STARTING, ACTIVE, RESOLVED, INSTALLED), is also shown, as are the possible actions related to each bundle: start, stop, uninstall. Note that users can only opt to uninstall a bundle once this has been previously stopped.
In this area of the portal, users can install bundles on a selected runtime, as well as verify the version of an installed bundle.
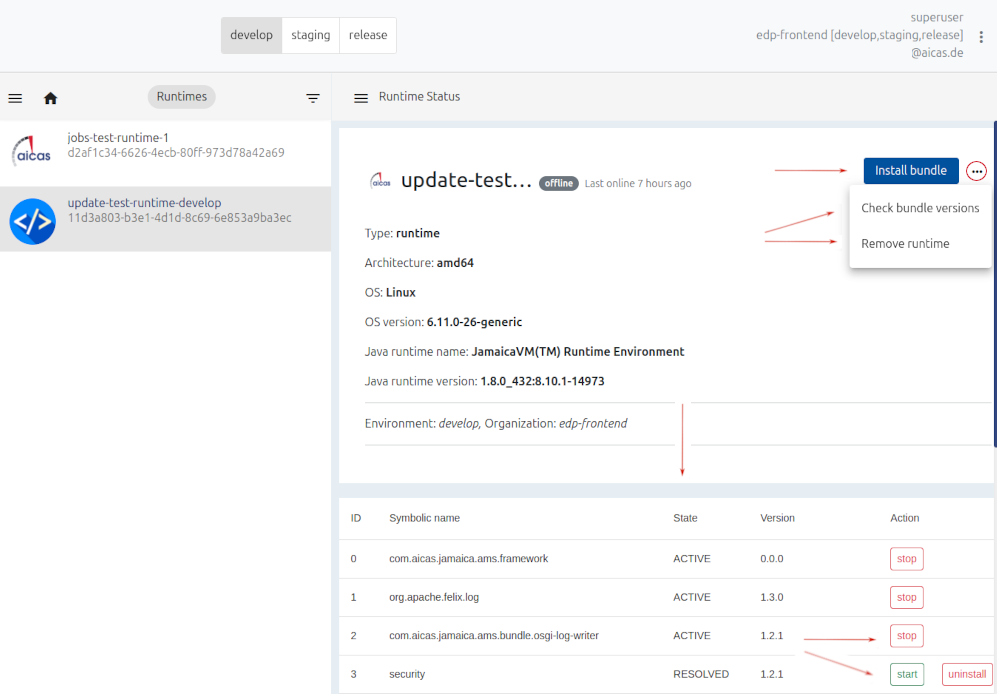
For each runtime, bundles are listed.
Also at this point, users can remove runtimes from EDP. To do that, first they must select the runtime and follow by choosing “Remove runtime”, confirming then the action on the subsequent dialog window.
Please note that
Currently EDP does not provide isolation between users’ runtimes when removing them. That means, users can remove any runtimes available in the environment defined in their permission profile, independently of who created them, or whether they are being used.
Status, Type and Search
The runtime status reports if the instance is online or offline. By starting a device which is connected to the cloud, its runtimes’ status will show online; the shutdown will switch it to offline.
Runtimes are associated to AWS “Thing” types. This allows EDP to store description and configuration information that is common to all runtimes associated with the same type.
On the “Thing” type
A “Thing” is defined in AWS IoT as a representation of a specific physical or logical entity. It can be a physical device or sensor; it can also be an instance of an application or a physical entity that does not connect to AWS IoT but is related to other devices that do. <https://docs.aws.amazon.com/iot/latest/developerguide/thing-types.html>
The use of a standard type (in EDP’s case, “device”) simplifies resource management by providing consistent registry data for runtimes that share the same type. On the other hand, types provide “Things” with a common set of attributes that describes identities and capabilities. Currently the type “device” is automatically predefined for all new runtimes.
Registering a New Device
Aicas can support customers by registering devices and providing certificates for them. However, in case of EDP clients with an own AWS account, their admins will assume these tasks. A complete step by step on connecting devices for EDP is given here.
In the AWS IoT services portal, it is possible for integrators and administrators to inspect and eventually edit attributes of devices.
Please note that: During registration, a new device certificate will be created and downloaded to the device. This certificate is named <thing-name>.p12 and gets embedded into the setup folder of the EDP Client bundle. Once incorporated to the OSGi framework, the EDP Client connects the device to the cloud.
Downloading the EDP Client
The EDP Client component plays a central role in connecting clients’ runtimes to EDP.
Users can download the EDP Client directly from the web portal. When in the
Runtimes area, just click on the Get Client button and the zip file is
downloaded. After the package is extracted, go to section Connecting Devices
to complete the settings.
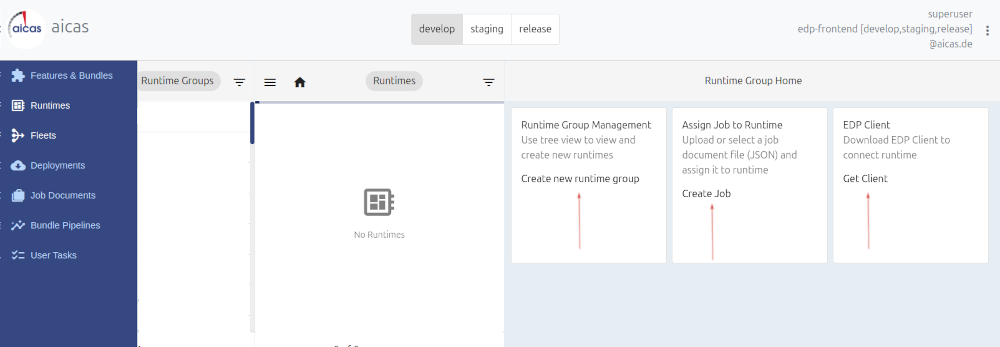
Under Runtimes users can get the EDP Client.
Fleets
An extension of the Runtimes view is offered under Fleets. Fleets are non-hierarchical groupings that define their contained individual runtimes and runtime groups by the use of property filters.
When choosing the menu option Fleets, users can define these components, through establishing search properties that resolve the logical conditions and dynamically create them.
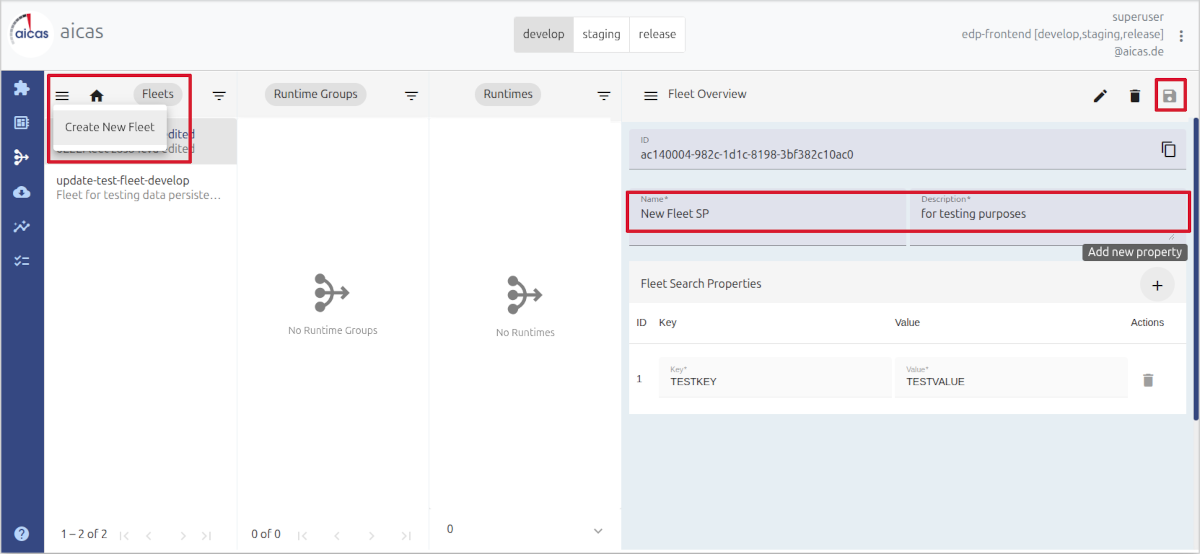
Create fleets and define properties.
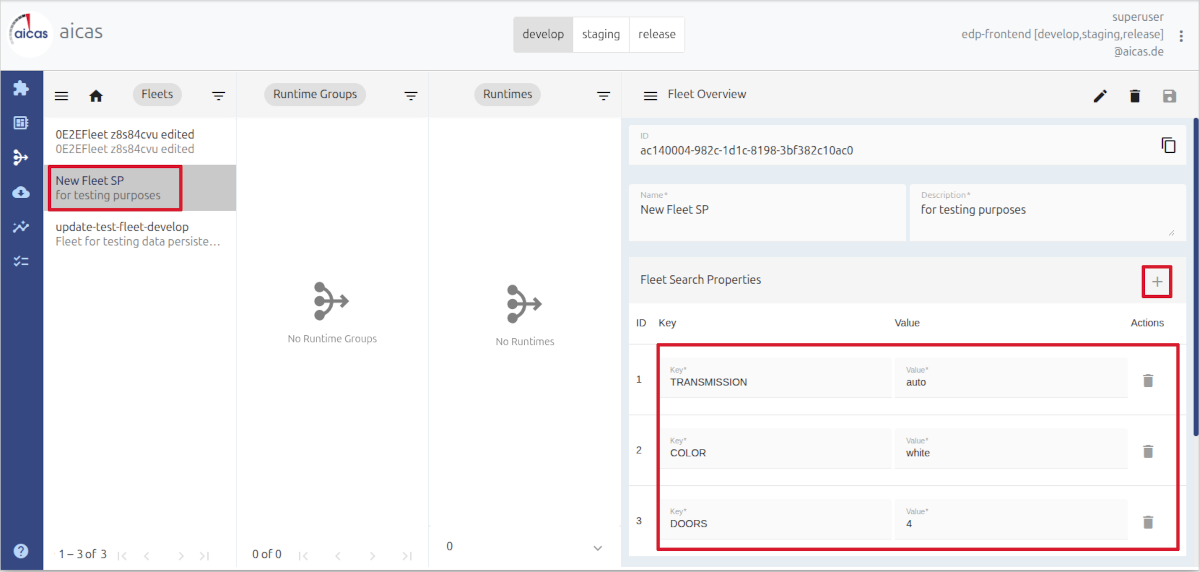
Fleet criteria consist of multiple key-value pairs.
Which runtimes and groups of runtimes meet the criteria to populate fleets is determined when you enter and edit your runtimes and groups in EDP. Users can dynamically set properties to groups and runtimes that will match (or exceed) the properties demanded by a fleet.
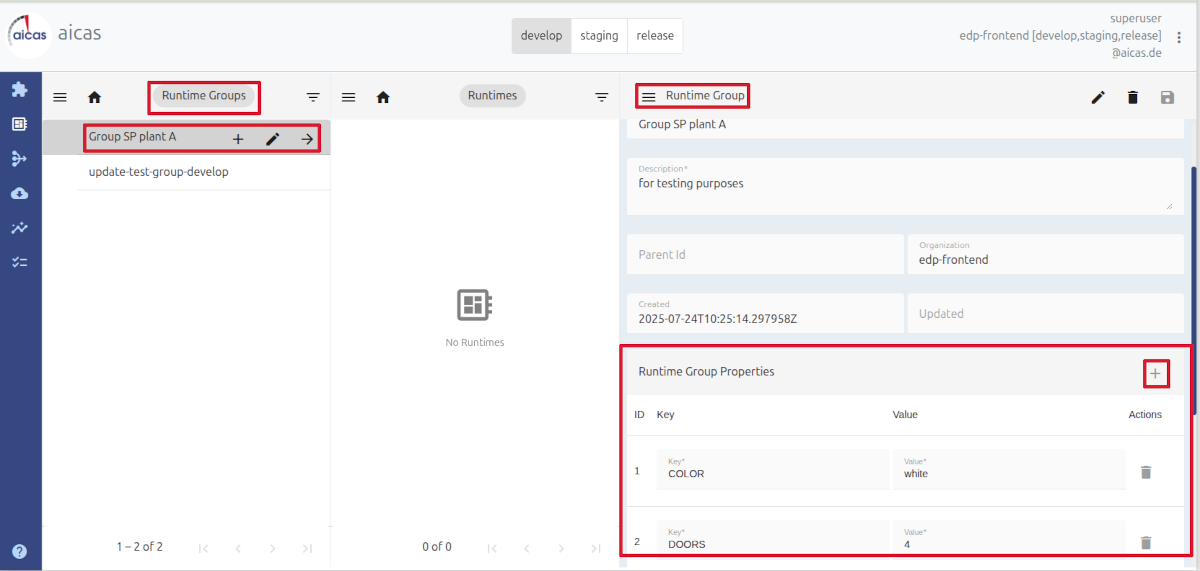
Runtimes and runtime groups can simultaneously belong to multiple fleets.
Deployments
EDP offers users the possibility to register various deployments from different sources to various targets. Sources would be feature versions or artifacts, while targets are runtime, runtime groups or fleets.
For each deployment, users must enter description, source and target types. This helps to keep the overview of all deployments and improve managing them. In the list of deployments, one can follow up the status, if failed, pending or in progress.
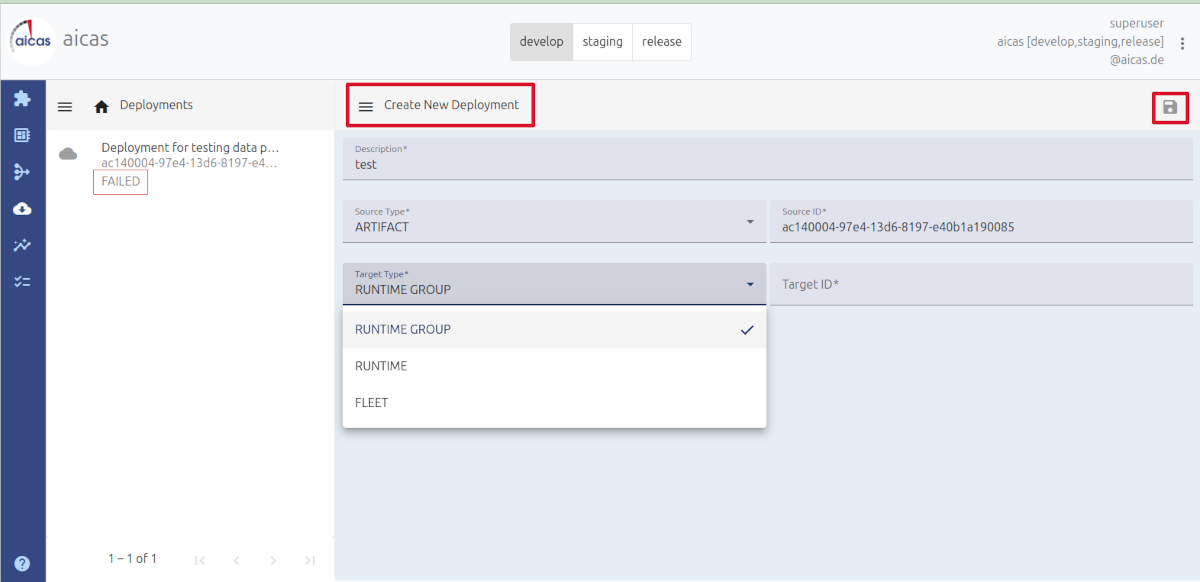
Create new Deployments; status of existing ones are indicated.
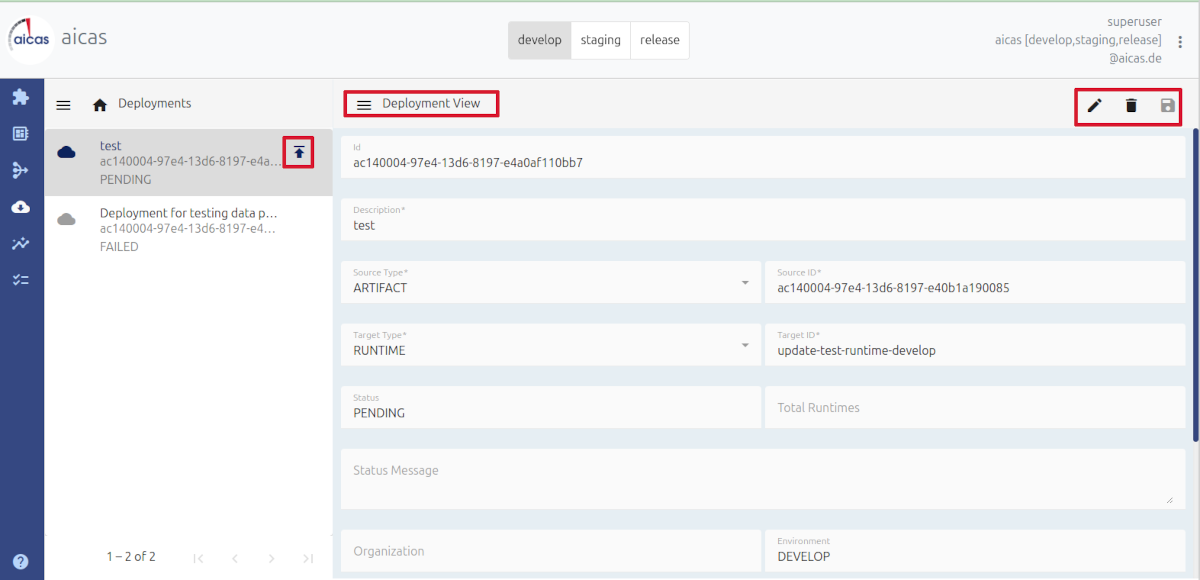
After verifying the “Deployment View”; press “upload” to send to the target.
The hamburger menu (three bars menu) in the deployment view offers action options that depend on the status. While a deployment is still “pending”, users can opt to deploy it. Once started, the deployment’s status changes into “in_progress”. Users can then cancel it and define a time interval to auto refresh the view. This menu also offers to clear history or close the development view window.
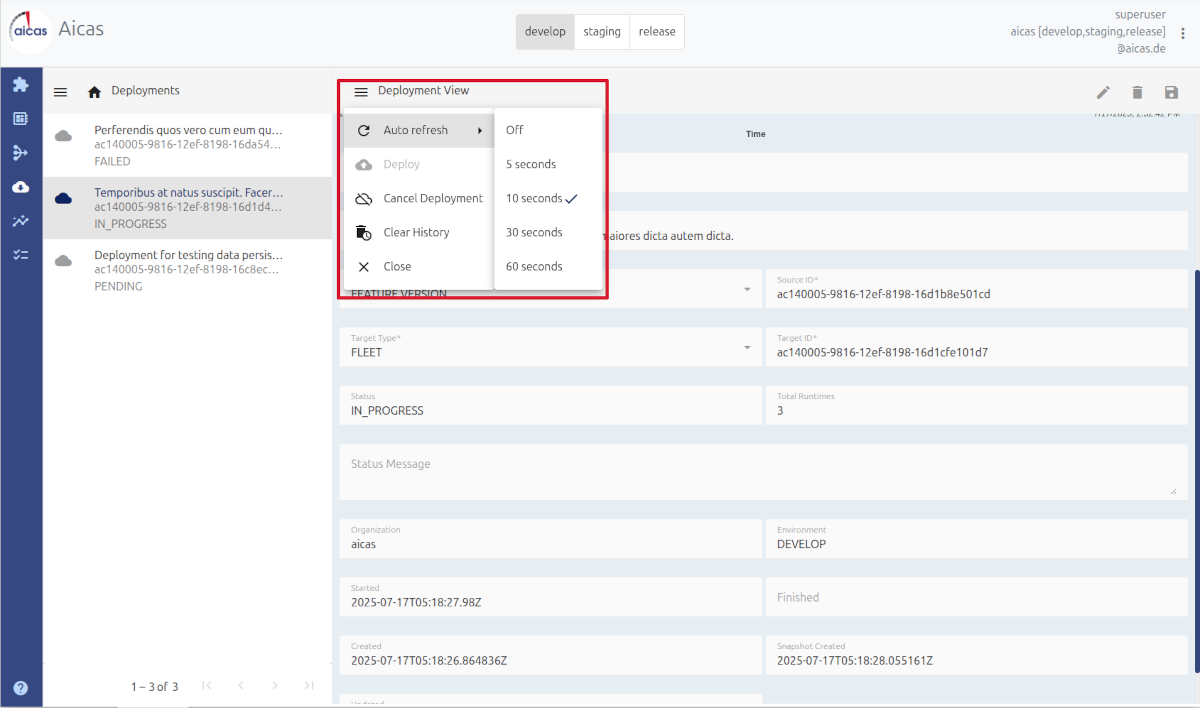
“Deployment View” offers a menu of actions, depending on the status.
EDP offers graphical views of deployments’ progress in a timeline and also a percentage view of their final performance, in terms of successful termination.
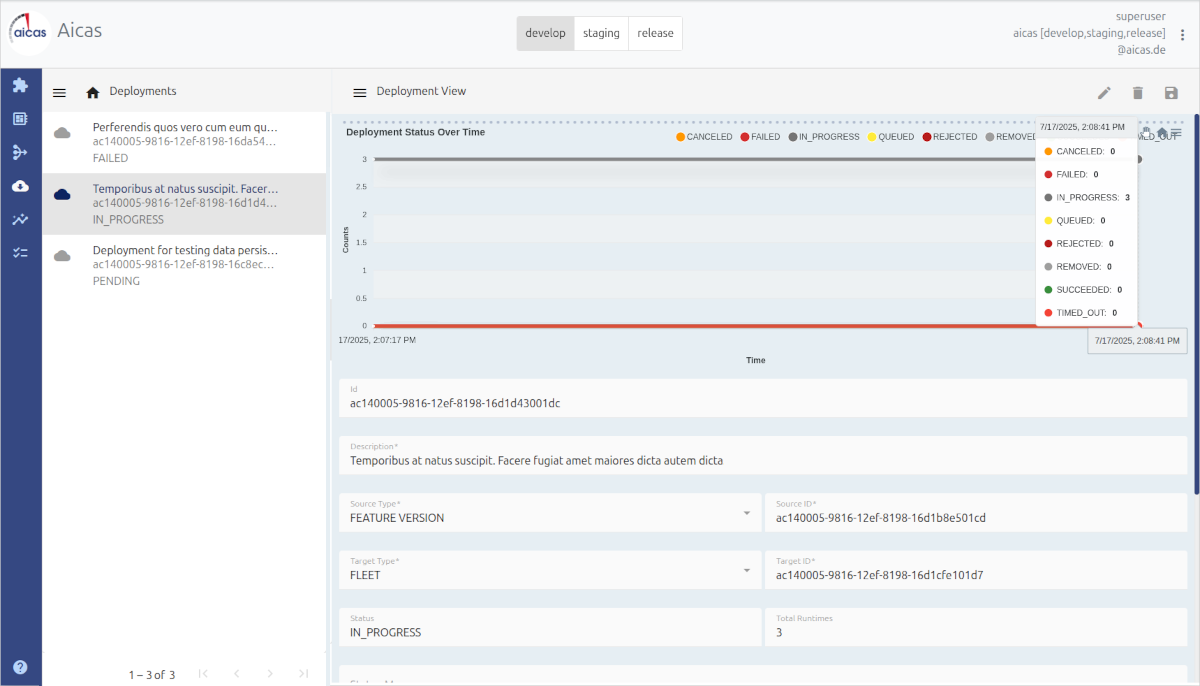
View of deployments’ progress over time.
Let us say, a specific artifact is deployed in three runtimes. At a given moment in time it could have already been successfully run in one runtime, have failed in another and be in progress on the third one. EDP would show in green, red and gray the different states of the deployment in all three units.
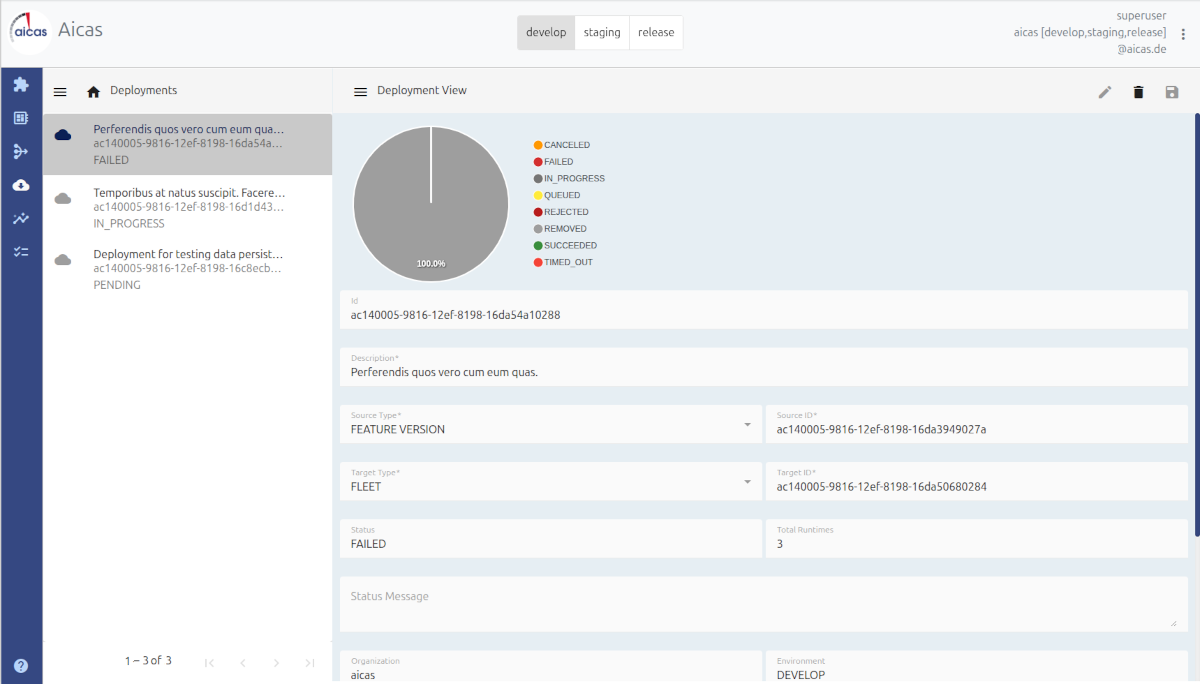
View of the percentage of successful deployments.